PMI SmokeNINJA PRO Review: My Honest Thoughts After Using It in Fashion and Portrait Photography
Why I Prefer Creating Effects During the Photoshoot Instead of in Photoshop
If you've been following my work for a while, you probably know that I absolutely love experimenting with practical effects.
Don't get me wrong—I use Photoshop and Lightroom every single day. They are incredible tools and an essential part of my workflow. But whenever possible, I always try to create the effect in camera instead of adding it later during editing.
There is something incredibly satisfying about looking at a finished image and knowing that the atmosphere, the lighting, the reflections, or the smoke were actually there while I was pressing the shutter.
For me, photography is about solving creative problems during the shoot. Every practical effect feels like a small challenge that makes the final image even more rewarding.
That's why you'll often see me using prism lenses, crystal filters, projection lights, fans, colored gels, reflective materials, and now—smoke.
(If you'd like to see another creative tool I frequently use, check out my article about Prism Lenses and how they help create unique in-camera effects.)
Why I Wanted a Better Smoke Machine
I've actually been using smoke in my photography for years.
Smoke adds something that editing simply can't recreate perfectly. It creates atmosphere, separates the subject from the background, catches light in beautiful ways, adds depth, and instantly makes an image feel more cinematic.
The problem wasn't the effect.
The problem was the equipment.
For several years I used a budget smoke machine that I purchased from Amazon for around $65. It worked well enough, but it had several limitations that prevented me from using it as often as I wanted.
First, it was large and bulky.
Second, it always had to be plugged into the wall.
Third—and this was probably my biggest frustration—it usually required another person to help me.
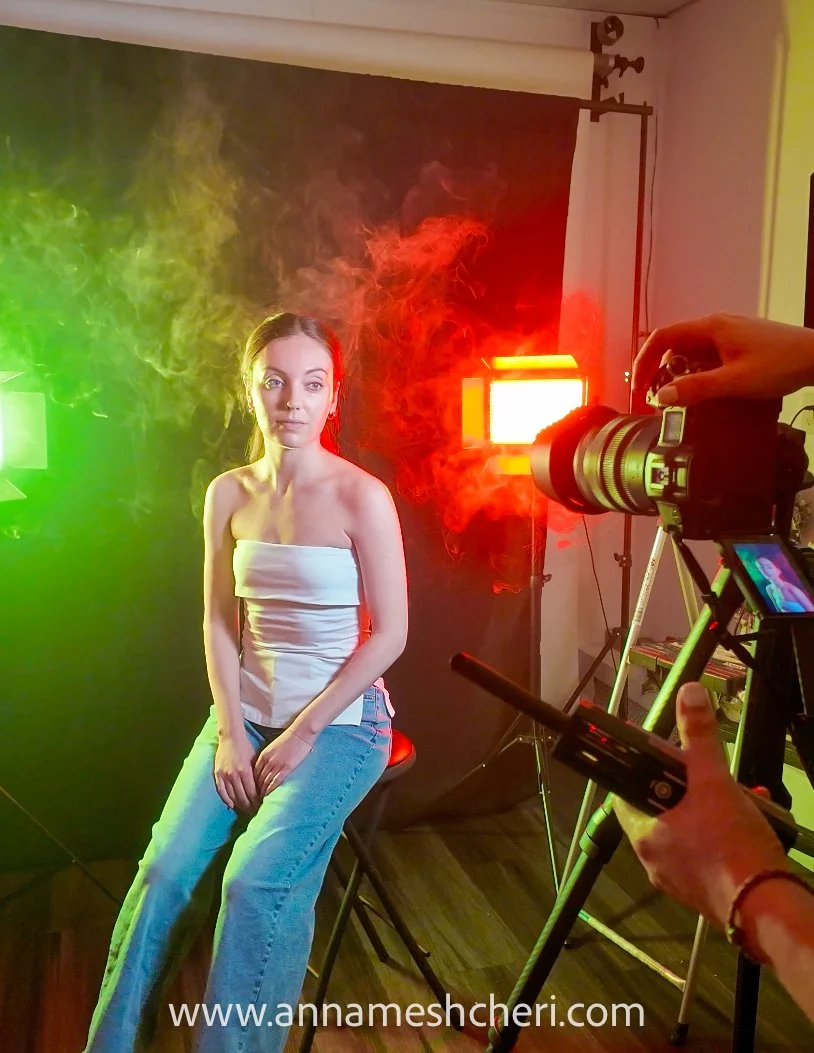
I'd position the smoke machine, press the button, wait for the smoke to start, quickly run back to my camera, take a few photos before the smoke disappeared, and then repeat the entire process again.
If I wanted the smoke coming from a specific direction, I'd often need someone else standing behind the model operating the machine while I photographed.
As a photographer who frequently shoots alone, that simply wasn't practical.
Eventually, I found myself avoiding smoke altogether—not because I didn't love the effect, but because setting everything up became too much work for quick creative sessions.
Why the PMI SmokeNINJA PRO Caught My Attention
For quite some time, I'd been noticing photographers and filmmakers using the PMI SmokeNINJA PRO.
Every time I saw behind-the-scenes footage, I thought the same thing:
"That looks so much easier than my current setup."
The idea of having a lightweight, handheld smoke machine that could fit inside my camera backpack was incredibly appealing.
So when PMI reached out and offered to send me the SmokeNINJA PRO along with their Bubble Kit, I was genuinely excited—not just because it was new gear, but because I wanted to see whether it would actually solve the biggest problems I had with my previous smoke machine.
After spending time testing every mode in my studio and incorporating it into my creative workflow, I can finally share my honest thoughts.
Let's see if the hype is justified.
First Impressions
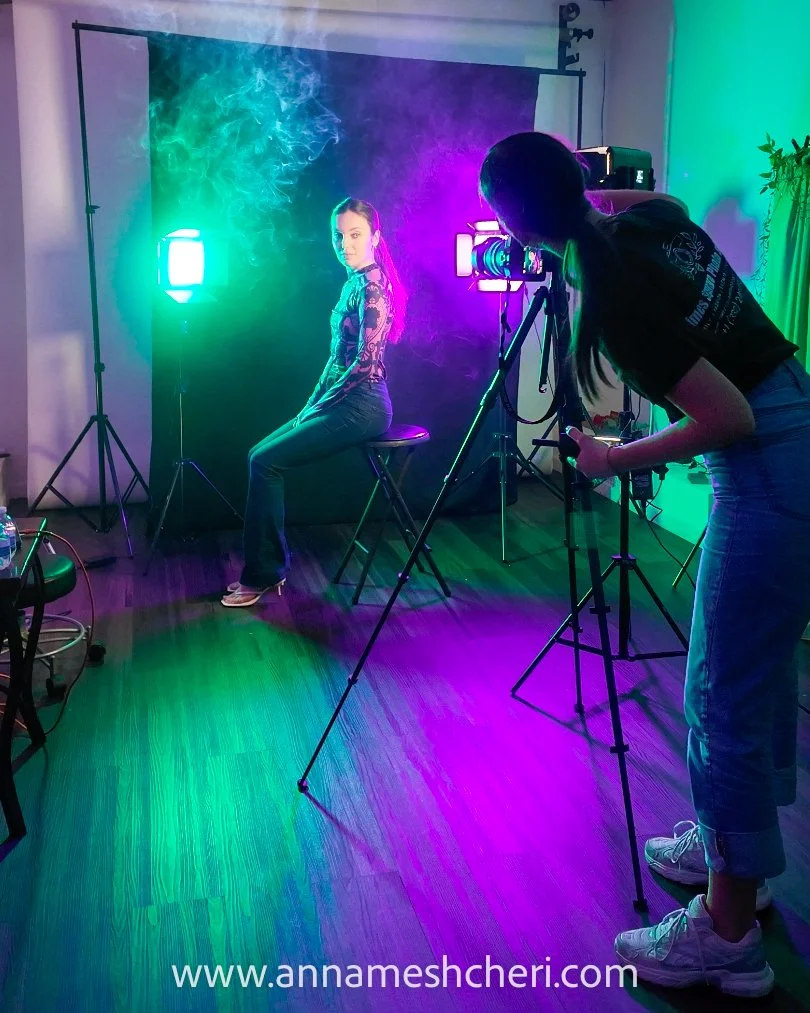
The very first thing that surprised me was the size.
After years of working with a large, wired smoke machine, holding the SmokeNINJA PRO in my hand almost didn't feel real. It's compact, lightweight, and small enough to fit inside my camera backpack without taking up much space. For photographers who travel frequently or shoot on location, that's already a huge advantage.
Setting it up was quick and straightforward. After charging the battery and filling it with the smoke liquid, I was ready to start experimenting within minutes.
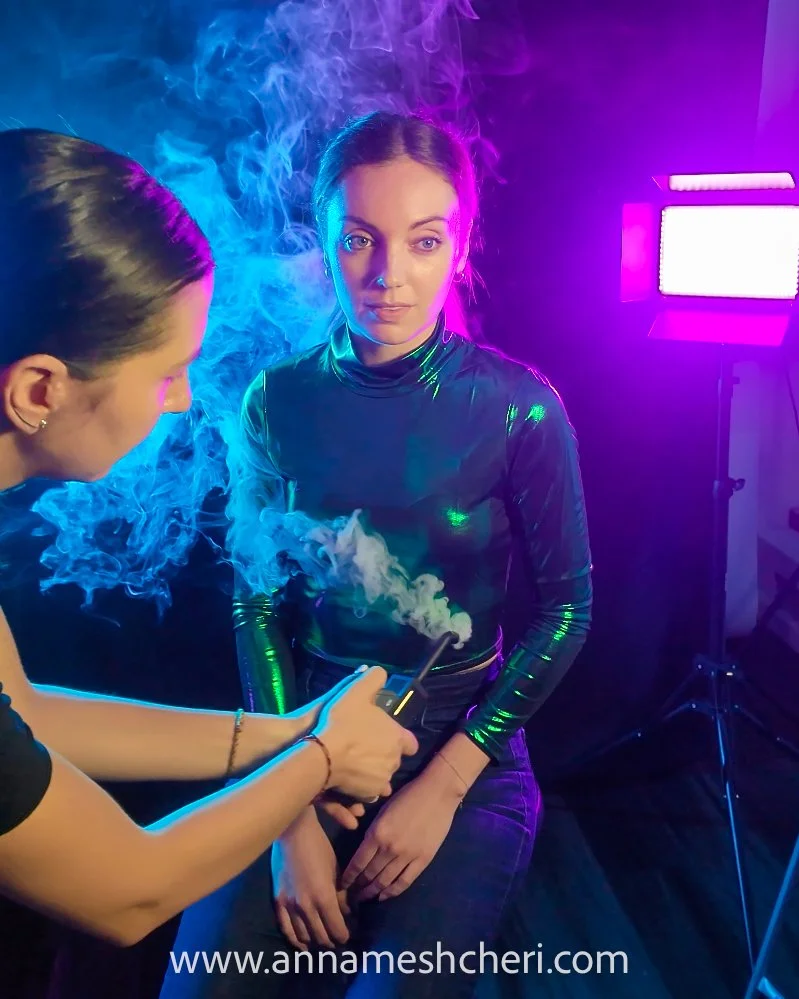
One feature I immediately appreciated was the remote control.
This might sound like a small detail, but for photographers, it's a game changer.
Instead of standing next to the smoke machine and rushing back to the camera before the smoke disappeared, I can now position the SmokeNINJA PRO exactly where I want it—behind the model, next to the subject, or hidden within the set—and trigger it remotely while staying behind my camera.
That alone completely changes the workflow.
For the first time, I felt like I was actually in control of the smoke instead of chasing it.
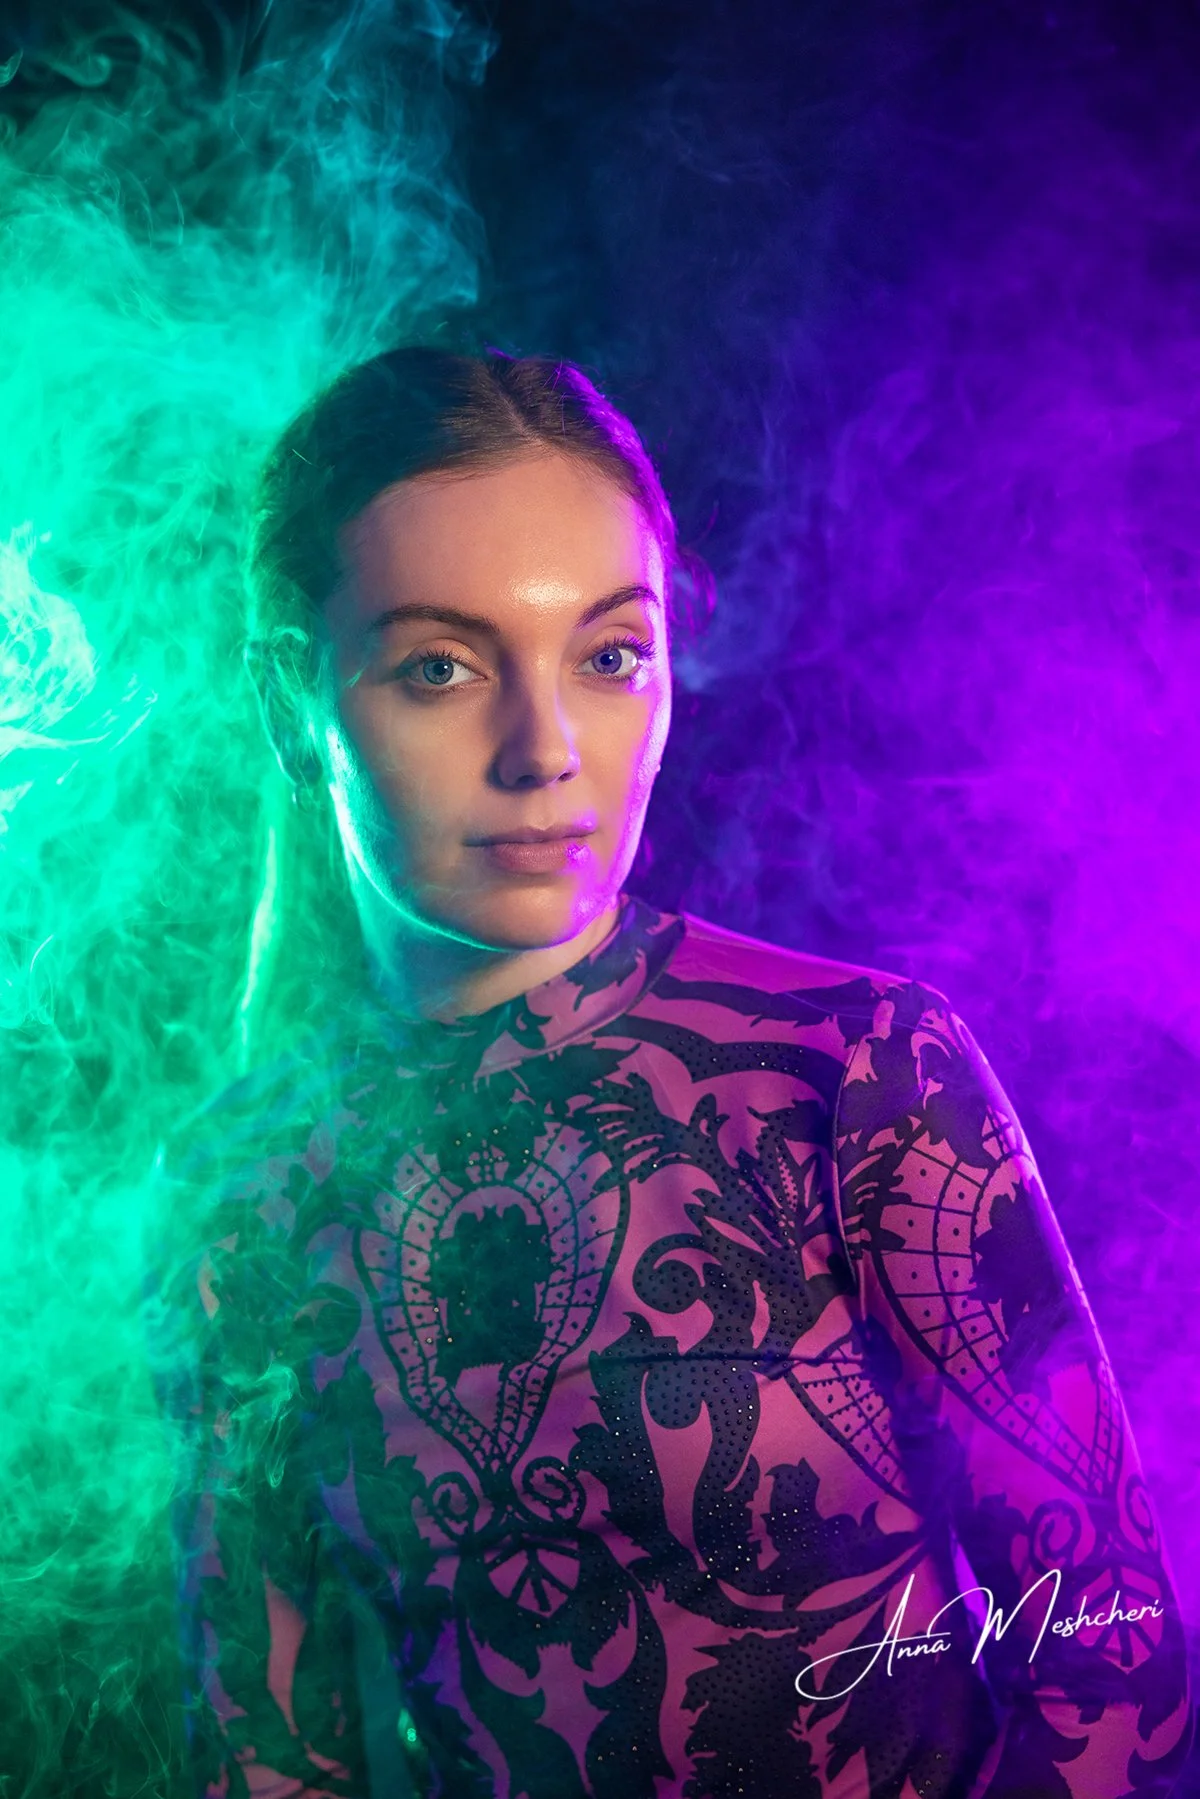
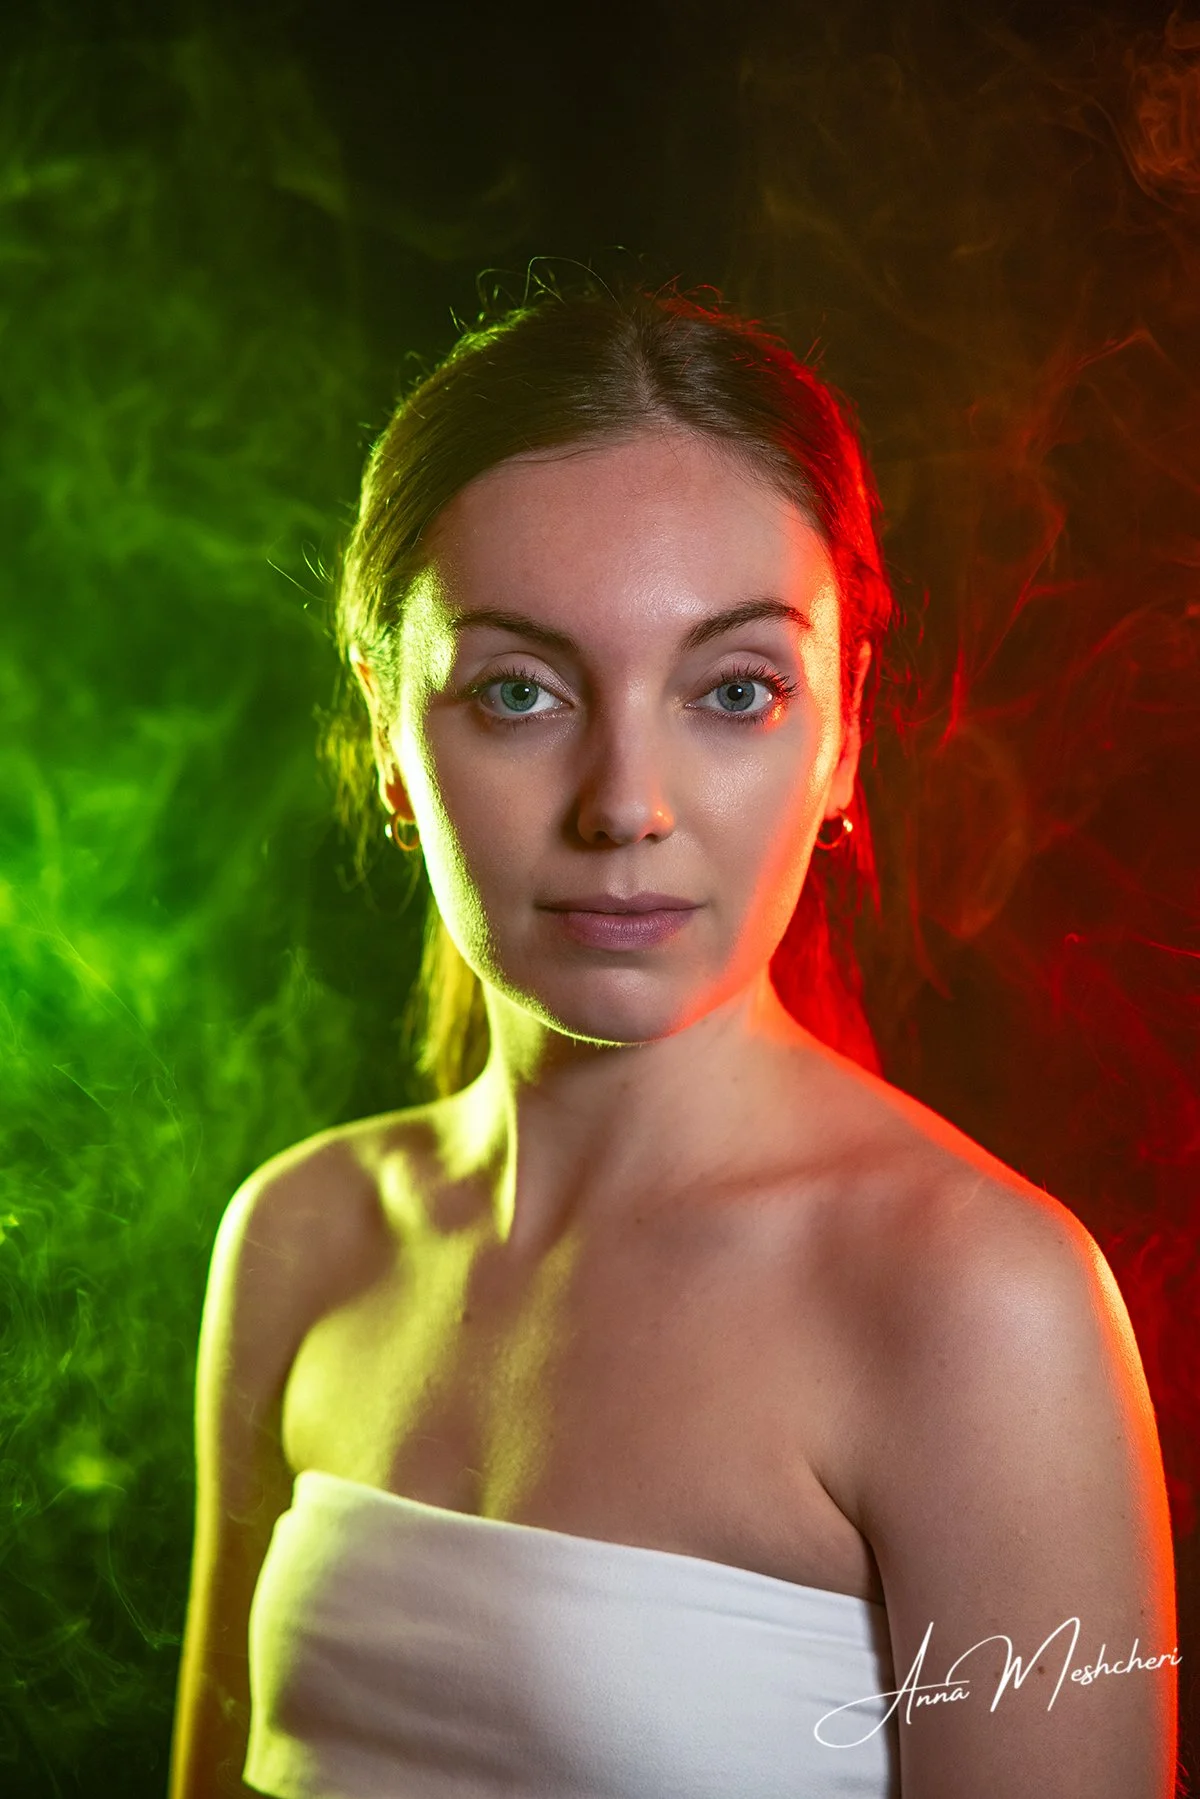
Fog Mode – My Favorite Everyday Effect
The first setting I tested was Fog.
This is probably the effect I see myself using the most during portrait and fashion photoshoots.
The fog is dense enough to create beautiful atmosphere, but it still has a soft, natural appearance. What impressed me most was how well-defined it looked when light passed through it. Instead of becoming one flat cloud, it creates texture and layers that photograph beautifully.
For portrait photography, it works especially well when you want to separate your subject from the background or create a more cinematic mood.
Even a small amount of fog can completely change how a scene feels.

Dry Ice Mode – My Personal Favorite
Out of all the settings, Dry Ice quickly became my favorite.
The smoke has a much thicker, heavier appearance than the regular fog mode, which opens up a completely different range of creative possibilities.
I can already imagine using it for:
Editorial fashion photography
Beauty portraits
Product photography
Luxury branding sessions
Creative conceptual portraits
For product photography, I think this effect is incredible. It naturally creates that dramatic "dry ice" look around products without needing actual dry ice.
For portraits, I love placing it behind the subject and letting the light catch the smoke. It creates dramatic depth while still allowing the person to remain the focus of the image.
This is definitely the mode I'm most excited to continue experimenting with.
Steam Mode
The third setting is Steam.
Compared to Fog and Dry Ice, it's a much softer effect.
It's not designed to completely fill the scene. Instead, it creates subtle movement and atmosphere.
I can see myself using this effect whenever I want a hint of smoke without overwhelming the subject.
Sometimes less really is more.
Not every photograph needs dramatic clouds of smoke, and Steam offers another creative option depending on the mood you're trying to achieve.

The Bubble Kit
Along with the SmokeNINJA PRO, PMI also sent me their Bubble Kit.
Honestly...
I wasn't expecting to enjoy it as much as I did.
The Bubble Kit produces bubbles filled with smoke, and it comes with different attachments that allow you to create different bubble sizes.
Watching them float through the studio is already fun.
Photographing them is even better.
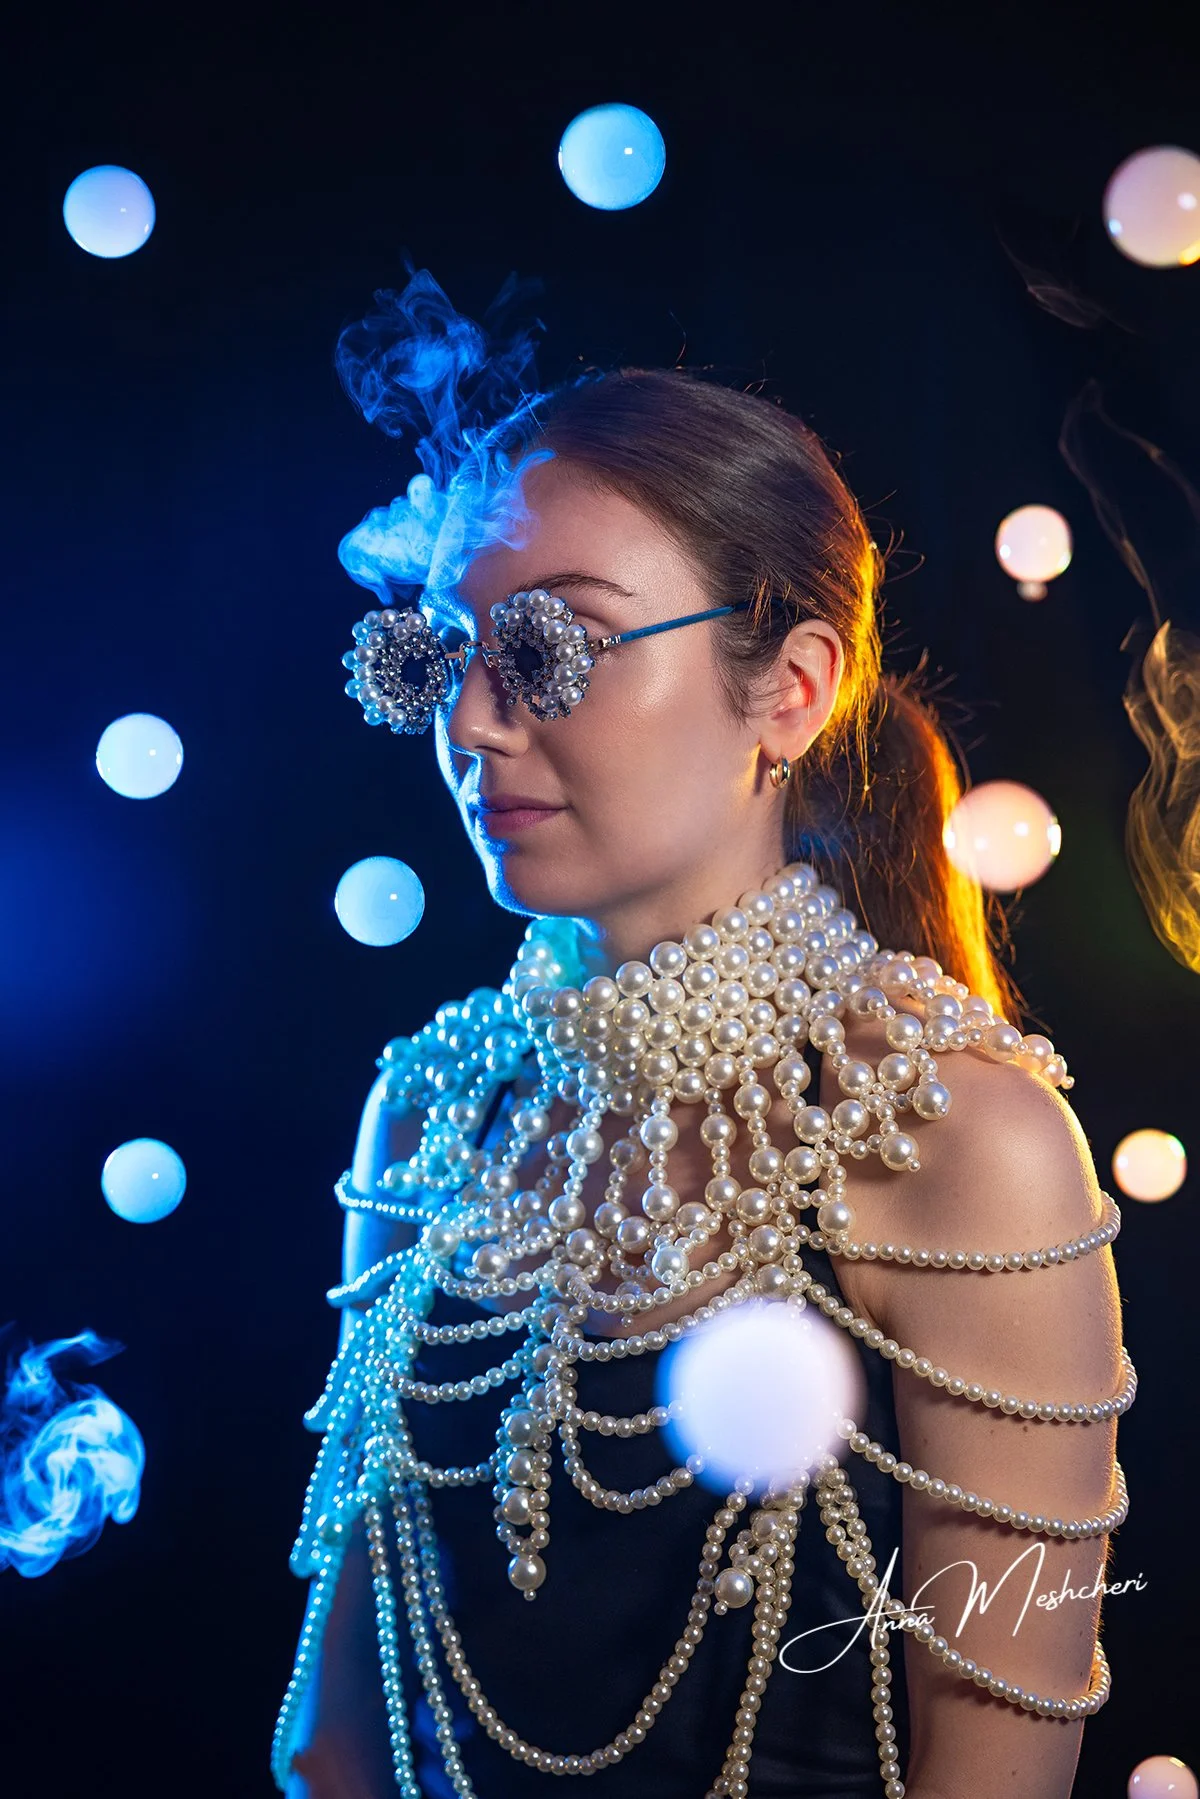
The larger bubbles are especially impressive because when they burst, they release a beautiful puff of smoke that creates an effect unlike anything I've photographed before.
I immediately started imagining different creative concepts.
I think these smoke bubbles would work beautifully for:
Fashion editorials
Portrait sessions
Fine art photography
Fantasy-inspired concepts
Creative maternity shoots
Children's portraits
Music videos
Social media campaigns
They're playful, unique, and instantly grab attention.
I've already shared several behind-the-scenes videos using the Bubble Kit, and I know this is only the beginning. I can't wait to keep experimenting with different lighting setups and creative ideas.
One Small Detail I Didn't Expect to Appreciate
One thing I noticed almost immediately was the smoke itself.
My previous smoke machine always had a noticeable chemical smell that lingered throughout the studio.
This one doesn't.
That makes a surprisingly big difference during longer sessions.
Another thing I appreciated is how the smoke behaves.
It photographs beautifully while it's in the air, but it also dissipates relatively quickly once you're done shooting. If I want to clear the scene, a little airflow is usually enough to move the smoke away, making it easy to reset for the next shot.
For photographers working in smaller studios like mine, that's a huge advantage.
Instead of waiting around for the room to clear, I can move on to the next setup much more quickly.
At this point, it's safe to say that the PMI SmokeNINJA PRO has already earned a permanent place in my camera bag.
My Tips for Using a Smoke Machine in Photography
Over the years, I've learned that simply having a smoke machine doesn't automatically create beautiful photos.
Like any creative tool, it's all about how you use it.
Here are a few things I've learned that have made the biggest difference in my own photography.
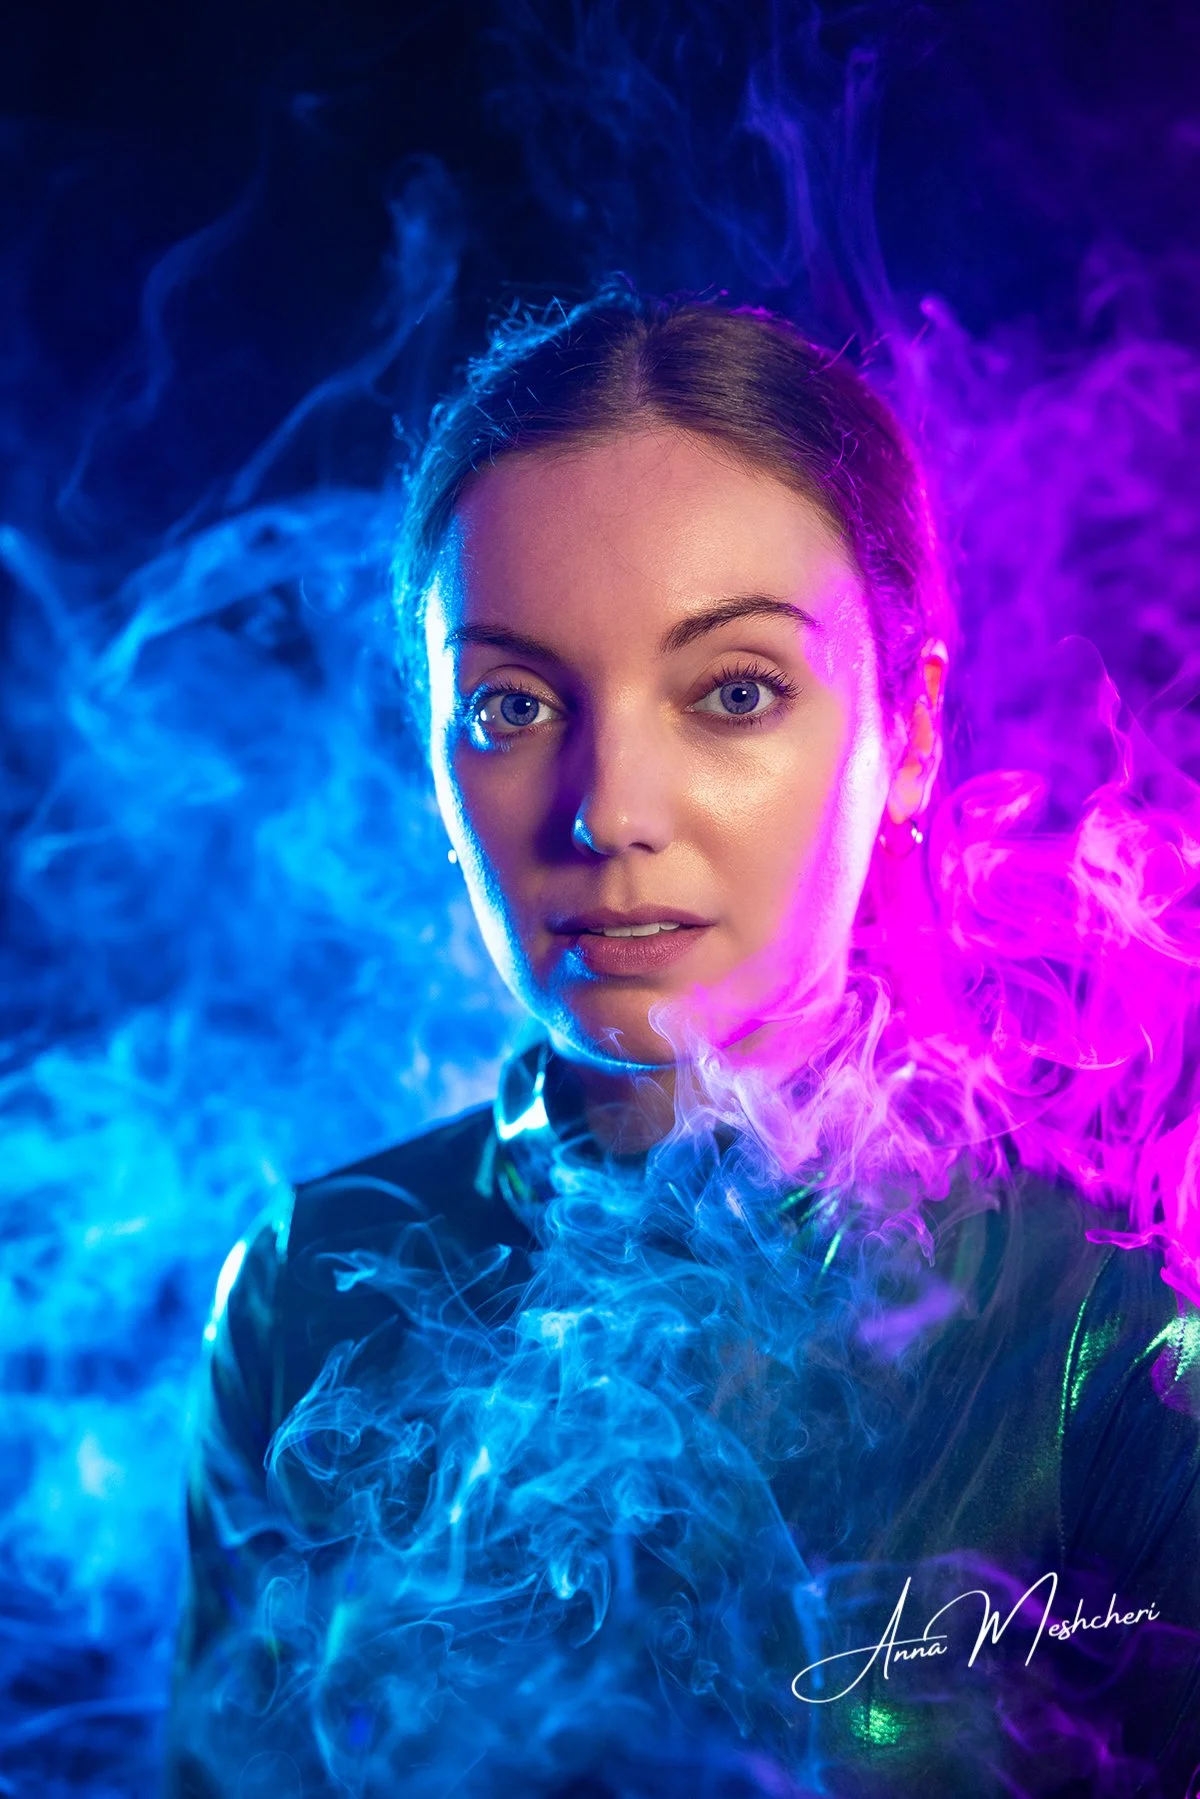
1. Backlight Is Your Best Friend
If there's one tip I can give photographers, it's this:
Light the smoke—not just your subject.
Smoke becomes much more visible when light passes through it from behind or from the side.
For many of the images I created while testing the PMI SmokeNINJA PRO, I placed one of my LED lights behind the model so it illuminated the smoke instead of shining directly into the camera.
The difference is incredible.
Instead of looking flat, the smoke suddenly gains texture, depth, and beautiful layers that make the entire image feel more cinematic.
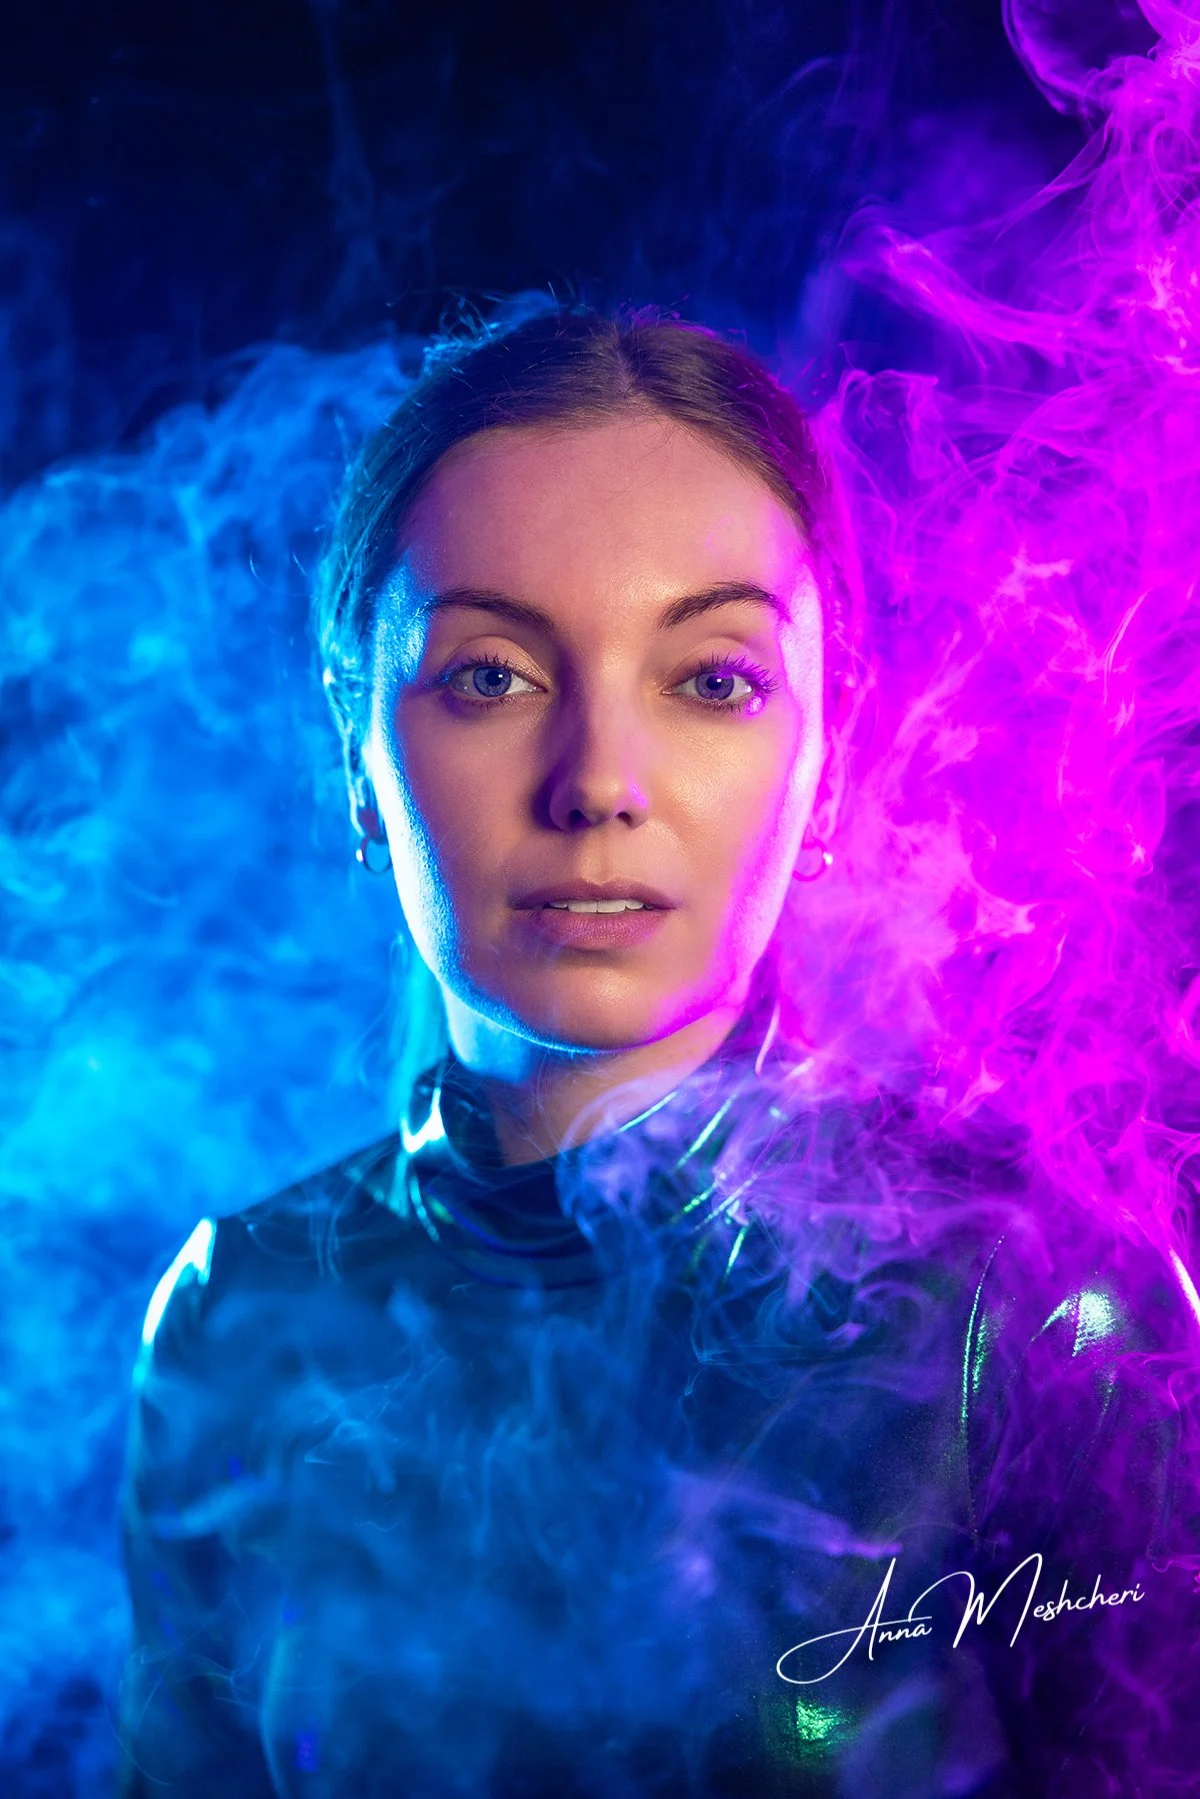
2. Less Is Often More
When people first start using smoke, they usually make the same mistake:
They use way too much.
It can be tempting to completely fill the room, but doing so often hides your subject and reduces the contrast in the image.
Personally, I prefer adding just enough smoke to create atmosphere while still keeping the focus on the person I'm photographing.
Sometimes a small amount of smoke creates a much stronger image than filling the entire studio.
3. Smoke Creates Depth
One of my favorite things about smoke isn't actually the smoke itself.
It's the depth it adds.
Photography is a two-dimensional medium, so I'm always looking for ways to make an image feel more three-dimensional.
Smoke naturally creates layers between the camera, the subject, and the background.
Even a subtle amount can make the photograph feel richer and more immersive.
4. Every Puff Is Different
One thing you'll quickly notice is that smoke is unpredictable.
No two frames are exactly the same.
That's actually part of the fun.
I usually shoot continuously while the smoke moves because every second creates a slightly different shape and pattern.
Sometimes the very last frame ends up being my favorite.
5. Experiment With Different Light Sources
One reason I enjoy using smoke so much is that it reacts differently to every lighting setup.
Soft light creates a dreamy atmosphere.
Hard light adds drama and texture.
Colored lights can completely change the mood of the scene.
Don't be afraid to experiment.
Some of my favorite images have come from simply moving one light a few feet or changing its angle.
What I Plan to Use the SmokeNINJA PRO For
After spending time testing the SmokeNINJA PRO, I already know it's going to become a permanent part of my camera bag.
I'm especially excited to use it for:
Fashion editorials
Portrait photography
Beauty photography
Product photography
Branding sessions
Maternity photography
Creative conceptual shoots
The portability alone means I'll use it far more often than my previous smoke machine.
Instead of debating whether it's worth carrying to a shoot, I can simply place it in my backpack alongside my cameras and lenses.
That convenience makes a much bigger difference than I originally expected.
Final Thoughts
Overall, I've genuinely enjoyed working with the PMI SmokeNINJA PRO.
It solved the biggest frustrations I had with my old smoke machine by being lightweight, portable, remotely controlled, and incredibly easy to use.
What impressed me most wasn't just the different smoke modes—it was how naturally the machine fits into my workflow as a photographer. Instead of slowing me down, it gives me the freedom to experiment with new ideas while staying behind the camera.
I can already tell this is one of those pieces of equipment I'll continue reaching for whenever I want to add atmosphere, depth, or a cinematic feel to my images.
If you're a photographer who enjoys experimenting with practical effects, I think the SmokeNINJA PRO is absolutely worth considering, and here is the link where you can purchase it :)
Disclosure
PMI kindly gifted me the SmokeNINJA PRO and Bubble Kit for this review. As always, every opinion shared in this article is based on my own experience using the products in my studio.
This article also contains Amazon affiliate links. If you decide to purchase the SmokeNINJA PRO through my affiliate link, I may earn a small commission at no additional cost to you.
By using my link, you're not only getting an incredible creative tool—you’re also supporting my work as a photographer and content creator, allowing me to continue sharing free tutorials, behind-the-scenes content, and honest gear reviews.
Thank you so much for your support!
If you'd like to see the SmokeNINJA PRO in action, be sure to watch my YouTube video embedded above, where I demonstrate every smoke mode, the Bubble Kit, and show the final images I created using each effect.